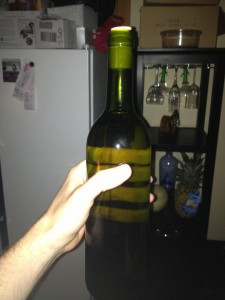
All right, so it’s been a couple months and you have a clear mead waiting for you in your secondary fermenter. It’s now time to bottle your glorious elixir. First things first, determine what kind of bottles you want to use. Obviously you can use whatever kind of bottle you want, but I would suggest using either the 750 ml wine or champagne bottles. I have used both and actually prefer the wine bottles, but I suppose for sparkling meads it may be nice to have a champagne bottle.
A note on using a bottling bucket. Many will give the advice to use a bottling bucket when bottling your mead, which is to siphon the contents of your secondary into a bottling bucket, and then using the spout on the bucket to siphon into the bottles. This is sound advice, however I usually skip this step out of laziness and lack of space and time. What I do is I siphon directly from the secondary right into the bottles. Of course if I was making beer and needed to add priming sugar to the mix, using a bottling bucket would be necessary. However I’m not adding any priming sugar, so I just bottle right from the secondary using my auto siphon and bottling wand. If you don’t have a bottling bucket and are planning on carbonating your mead, just use another fermenter and siphon your mead on top of the sugar, then use your auto siphon and wand from there. It should be noted that if you use a bottling bucket, an auto siphon isn’t needed for this step. I’ll assume we’re all bottling right from the secondary. Great.
For this step we’ll need a few things.
-siphoning tubing
-bottling wand
-bottles
-corks (I use #9 corks)
-corker
First, sanitize all your bottles. For this I use star san because I don’t feel like washing them off after I do it. My process is that I fill a bucket with star san solution and I dunk the bottles in. I wait until they fill up about half way and then take them out and pour out the solution. I then set the bottles aside in rows. Leave the bucket of solution in order to sanitize anything else you may need such as your siphoning tubing, corks, bottling wand, and auto siphon.
Get your secondary out of your closet and take the air lock off the top. Take a good whiff just to see what you are working with. Hopefully it smells nice and alcoholy. Now take your auto siphon and attach the siphoning tubing to the end. On the other end of the tubing take your bottling wand and attach it.
Now, take your wand and stick it in one of the bottles making sure the plunger is pressed down to allow mead to come through. Take a pump on the auto siphon to start the mead flowing. At this point make sure that you are paying attention to the flow of mead because you don’t want mead flowing all over your floor. I know that last sentence sounds silly, but I have to admit I have had this happen a number of times. I see what is happening and quickly jump up to stop the flow. You have to fight the monotony of what you are doing and stay ever vigilant. Don’t waste any mead!!! This should allow you about 20-21 750 ml bottles of mead per 5 gallons depending on how much of it you want to risk getting out of the bottom before delving into the spent yeast.
After you fill a bottle or two would be a good time to take a final gravity reading. Take your sanitized hydrometer tube and fill it with mead. Plunge the hydrometer in the tube and take a reading. Write down your results for accurate records.
Once all your bottles are filled, place the wand off to the side and get your corker out. It should be noted that there are a number of different corkers out on the market. For my purposes I would suggest getting the mid tier corker. This is the one with two handles on either side. It works perfectly unless you have thousands of bottles to cork at one time. The low tier corker is the small plastic plunger thing and it’s garbage in my opinion as it’s hard to get any leverage. Invest some money and get the mid tier one.
Grab a cork, dunk it in the sanitizing solution, pop it in the corker, and insert the cork into the bottle. Very simple! I have found that when corking, if you press all the way down on the corker it snaps into place when the cork is in the bottle, but you can go even further. Depending on how you like your corks in your bottles, play around with this. I like just a little bit of the cork sticking out of the top of the bottle myself because I usually don’t dress it up in any way. However, if you are planning on adding a wrapper or wax to your bottles then it may be a good idea to have the cork level with the mouth of the bottle.

After you cork all of your bottles, your next step is preparing labels and wax. If you don’t care about doing that, then just stick your bottles in a dark room temperature place and let them age for a few months to get the best flavor. Or, be like the Duke and drink them right away!
Check me out on Twitter
Follow @vikingsmashbrew
